

When the heat rolls in and you need something truly cold, something decadent, but you absolutely refuse to turn on your oven? That’s when I reach for my failsafe solution. This No-Bake Ultimate Oreo Ice Cream Pie is the dessert that saved me more times than I can count when I was cooking in professional kitchens and needed a quick party dessert. My grandmother always taught me that the best food is often the simplest, provided you respect the quality of the ingredients, and this recipe proves it. It’s rich, it’s crunchy, and honestly, it’s the easiest frozen dessert recipe you will ever put together; it’s one of my favorites from my collection of simple delicious desserts. Trust me, this homemade ice cream pie is about to become your new summer staple.
- Why This No-Bake Ice Cream Pie Recipe Works for Everyone
- Gathering Ingredients for Your Creamy Frozen Pie
- How to Make Ice Cream Pie: Step-by-Step Instructions
- Ingredient Notes and Substitutions for Your Ice Cream Pie
- Tips for Success When Making a Perfect Ice Cream Pie
- Serving Suggestions for Your Summer Ice Cream Pies
- Storage and Reheating Instructions for Leftover Ice Cream Pie
- Understanding Ice Cream Cake vs Pie for Frozen Desserts
- Frequently Asked Questions About Making an Ice Cream Pie
- Sharing Your Experience with This Ice Cream Pie
Why This No-Bake Ice Cream Pie Recipe Works for Everyone
I’ve tested countless recipes in the professional world, but when it comes to dazzling guests without stressing myself out, this ice cream pie is the undisputed champion. It’s built for the busy home cook. It delivers that gorgeous, layered look without any fussy baking steps. We’ve tweaked and tested this exact method in my own kitchen to ensure it holds up beautifully, making it a reliable inclusion in my collection of quick, easy weeknight dinners.
- It creates a truly satisfying texture contrast: hard, crunchy crust meets creamy, cold filling.
- It looks incredibly impressive, making your guests think you spent all day fussing when you didn’t!
- It’s incredibly flexible—you can swap out every flavor component and it still works magic.
Quick Prep Time for Your Ice Cream Pie
Seriously, we’re talking 20 minutes of active work, and that’s if I’m being slow while crushing the Oreos. Most of the time listed in the total time is just waiting for the freezer to do its job, which is exactly what we want when we’re craving a treat right now. This is the ultimate quick ice cream pie choice.
The Ultimate Frozen Pie Recipes Standard: No Oven Needed
When it’s 95 degrees outside, the last thing anyone wants to do is add more heat to the house by running the oven. This recipe adheres to the highest standard for no bake ice cream pie recipes. We skip the baking step entirely, which keeps things cool and simple, proving that the best frozen dessert recipes don’t require any heat at all.
Gathering Ingredients for Your Creamy Frozen Pie
The beauty of this particular ice cream pie is that it uses ingredients you likely already have on hand, making it perfect for last-minute hosting. This foundation sets you up for success, whether you stick with the classic vanilla or decide to explore other favorite ice cream pie flavors later on. Getting the textures right here is key to a perfect creamy frozen pie.
Crust Components for Your Oreo Crust Ice Cream Pie
For the crust, grab about 30 Oreo cookies—that translates to roughly 1 3/4 cups of crumbs. You want these crushed very fine. Then, mix those crumbs with exactly 1/2 cup of melted butter. Don’t skimp on crushing them; we’re aiming for the texture of wet sand here, which lets the butter bind everything together perfectly for that sturdy oreo crust ice cream pie.
Filling and Topping Essentials for this Ice Cream Pie
For the main layer, you need 1/2 gallon of vanilla ice cream, but pay attention—it needs to be *slightly* softened. I mean just barely yielding enough to spread without melting everywhere. You’ll also need 1/2 cup of chocolate fudge sauce, which you should warm up just a touch so it drizzles nicely. For the top, we whip 1 cup of heavy cream with 2 tablespoons of powdered sugar and a splash of vanilla extract until you get lovely stiff peaks.
How to Make Ice Cream Pie: Step-by-Step Instructions
Alright, this is where the magic really happens! Don’t worry about juggling too many things at once; the steps for this ice cream pie are straightforward, but timing that freeze is key. I’ve linked out to my detailed guide on how to make ice cream pie at home, but honestly, just follow the rhythm here, and we’ll have a showstopper ready for your next event.
Forming and Freezing the Oreo Crust Ice Cream Pie Base
First up, take those buttered Oreo crumbs we just discussed. Press them firmly into your 9-inch pie plate. I use the bottom of a measuring cup to really pack it down, making sure both the bottom and the edges are solid. That’s what keeps the crust holding its shape when we get to slicing. Once it’s packed tight, you have to give it a mandatory rest in the freezer for at least 30 minutes. This quick chill locks in the butter and gives us a sturdy foundation for our ice cream pie with cookie crust.
Layering the Ice Cream and Fudge for the Ultimate Ice Cream Pie
Now, gently spread your slightly softened vanilla ice cream evenly over that chilled crust. Don’t press too hard, or you’ll break your work! Once the ice cream layer is smooth, drizzle about half of your warmed fudge sauce right over the top. Then we send it back to deep freeze territory. This layer needs serious time—at least 2 hours, maybe more, until that ice cream is rock solid. This long freeze is the secret to keeping this a successful ultimate frozen pie recipe.
Creating the Light Whipped Topping for Your Ice Cream Pie
While that middle layer is firming up, make your whipped cream topping. Get your heavy cream, powdered sugar, and vanilla extract into a clean bowl. You need to beat it until you see stiff peaks forming. How do you know it’s right? When you lift the whisk, the peaks stand straight up and don’t flop over at the top. That gorgeous, airy texture is what makes this topping light and perfect, balancing out the rich crust underneath.
Final Assembly and Freezing of Your Homemade Ice Cream Pie
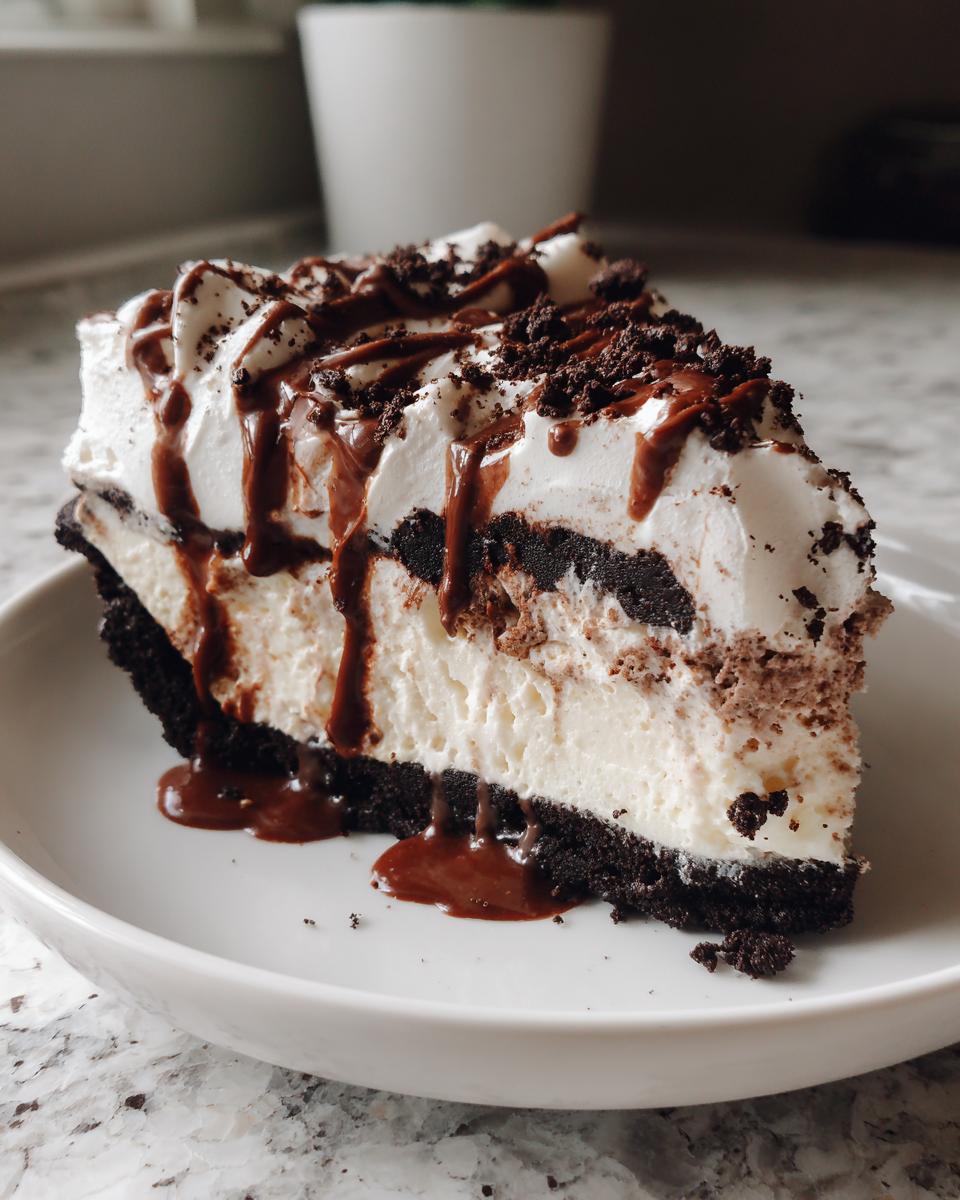
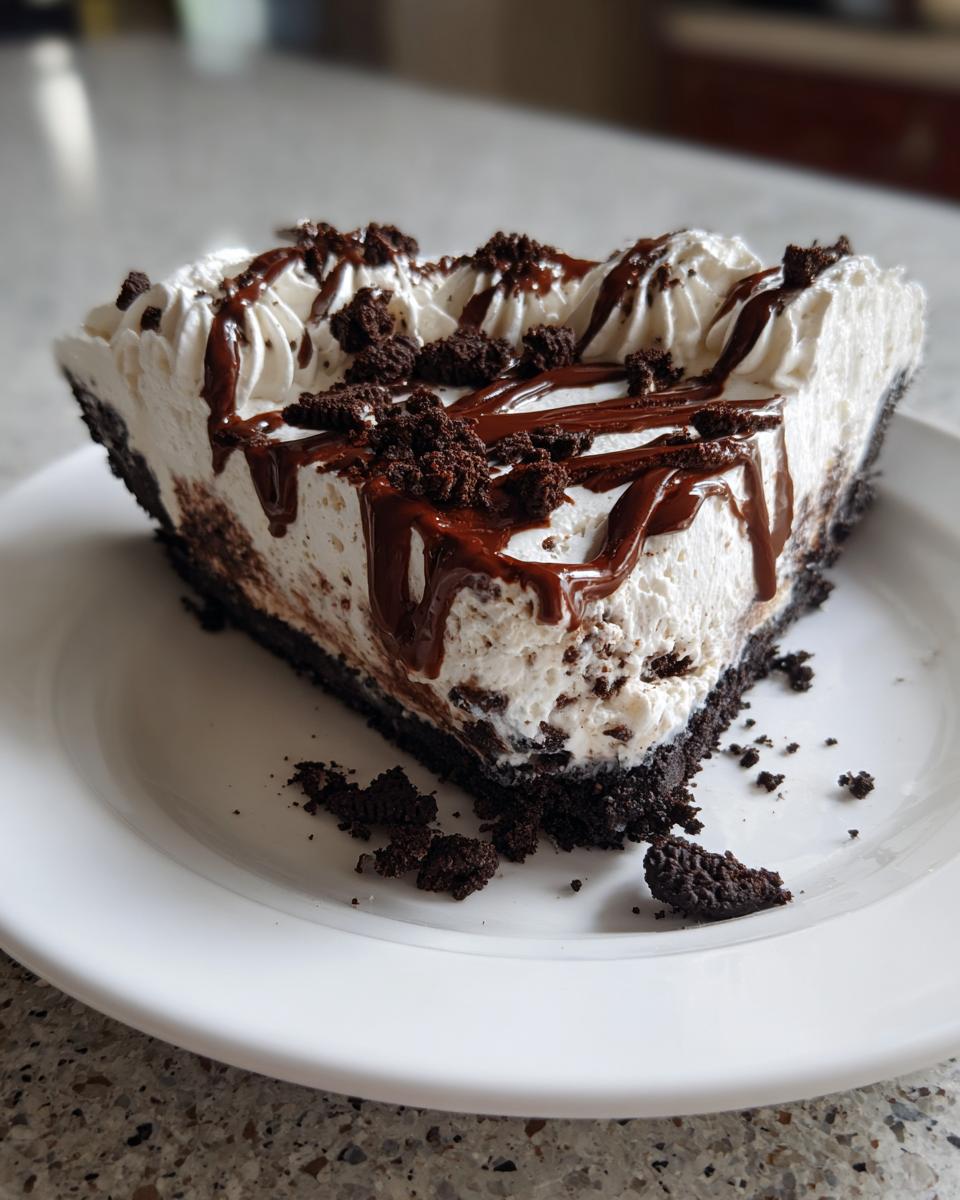
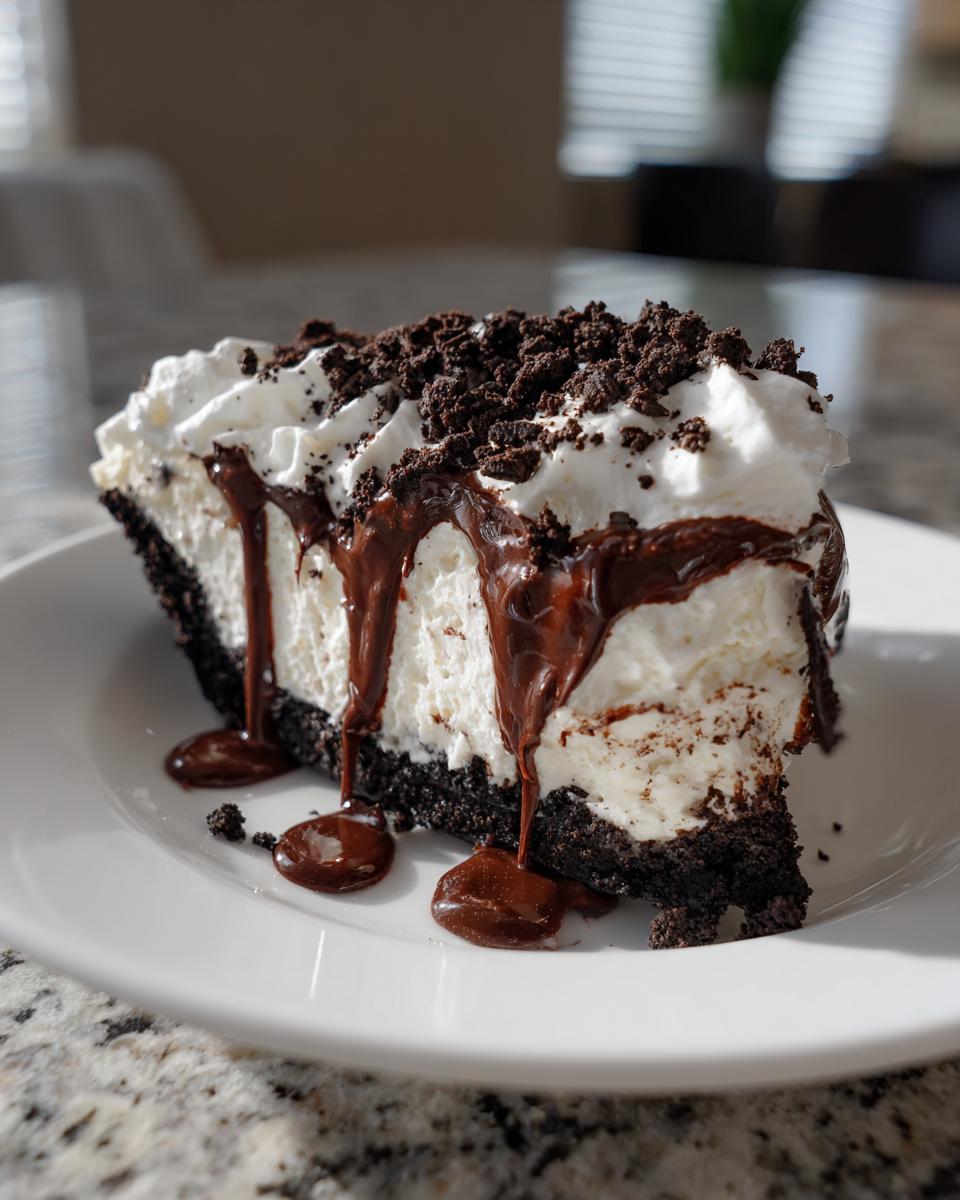
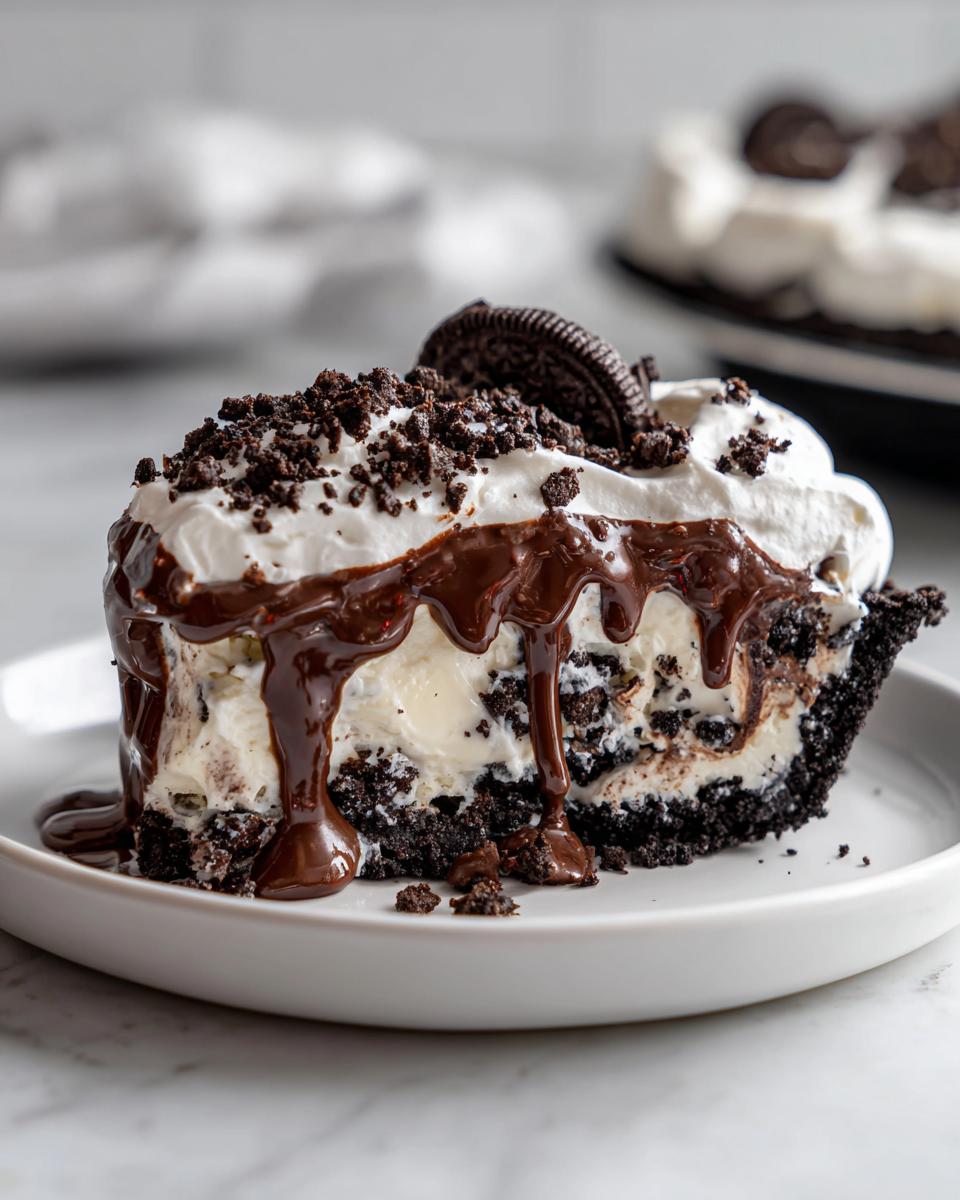
Okay, final stretch! Pull that solid pie out. Gently spread your beautiful whipped topping over the frozen fudge layer. Then, drizzle the rest of that chocolate fudge over the top—get creative with swirls! Sprinkle on any extra crushed Oreos if you like. This glorious homemade ice cream pie needs one last trip to the freezer. Freeze it for at least one final hour before slicing. This ensures every piece comes out looking sharp and perfect for your party dessert ice cream pie moment, just like they do in the professional inspiration photos often shared by others cooking up their ice cream pie at home.
Ingredient Notes and Substitutions for Your Ice Cream Pie
Now that you see how simple this base recipe is, I want you to feel empowered to make it your own! Part of building a great collection of peanut butter pie recipes or other frozen treats is knowing where you can flex a little. This recipe is super flexible, which is why it lands on my list of the best ice cream pie ideas. Always feel free to adapt, but know that the structure relies on these core amounts.
Swapping Ice Cream Flavors in Your Ice Cream Pie
Vanilla is great, but if you’re craving something bolder, go for it! You can swap that out entirely and use coffee ice cream, or maybe some bright strawberry ice cream for a change. Even mint chocolate ice cream works beautifully in that chocolate shell. This is what makes for a truly personalized and easy ice cream pie recipe—just make sure whatever you choose is softened to that perfect spreadable stage.
Also, if you’re in a real rush, you can skip making homemade whipped cream entirely. Just use one tub of thawed, frozen whipped topping instead. It saves you a few minutes but keeps the dessert feeling light and fluffy, which is crucial for a great ice cream pie.
Tips for Success When Making a Perfect Ice Cream Pie
Making any ice cream pie is easy, but making one that looks stunning when you slice into it? That takes a tiny bit of insider knowledge. I’ve learned a few tricks over the years that stop this dessert from turning into a sloppy mess, especially when I’m serving it at a big family cookout. These little steps move this from being just a good frozen treat to truly one of the best frozen treats around.
Achieving the Right Consistency for Your Ice Cream Pie Filling
This might be the single most important tip for any no bake ice cream pie: the softening time for your ice cream. You absolutely cannot take the vanilla ice cream straight from the deep freeze and try to spread it. It will crack your beautiful Oreo crust! But you also can’t let it turn into soup. I once rushed this step, and my filling was so hard I nearly broke my serving spatula trying to get the first layer in. Scoopable, yes. Melted, no! Let it sit on the counter for maybe 10 to 15 minutes, depending on how hot your kitchen is. You should be able to press a spoon into it without much resistance.
Slicing Your Decadent Ice Cream Pie Cleanly
This is the pro move that guarantees perfect slices for your party guests. Once your decadent ice cream pie has finished its final freeze, get a nice sharp chef’s knife—not a butter knife, use something sturdy! Dip that knife blade into a tall glass of very hot water for about 30 seconds. Wipe the blade completely dry with a clean towel, and then make your cut. I always wipe the knife clean and dunk it again for every single slice. If you do this, that thick fudge layer and the frozen vanilla will glide right through, giving you incredibly clean wedges every single time.
Serving Suggestions for Your Summer Ice Cream Pies
Just because this ice cream pie is already amazing doesn’t mean we can’t serve it with something special! Since we have that rich chocolate and crunchy Oreo base, I love playing up the cool, light textures. If you’re serving these summer ice cream pies outdoors at a barbecue, a small bowl of fresh, slightly tart raspberries on the side cuts through the sweetness beautifully. Or, if you’re feeling extra indulgent, a warm salted caramel sauce drizzled right before serving adds an unexpected depth that complements the cold vanilla perfectly. If you need a lighter side dish, check out my recipe for easy fruit dip recipe—it’s always a hit!
Storage and Reheating Instructions for Leftover Ice Cream Pie
The eternal struggle with making an ice cream pie is how to save the glorious leftovers! Since this is strictly a frozen dessert, you won’t be reheating anything, obviously, but how you store it makes a huge difference in its quality a few days later. If you make this amazing treat ahead of time—which I always recommend for party dessert ice cream pie prep—you need to shield it from the dreaded freezer burn.
The key here is airtight protection. First, make sure your pie is fully set after that final freeze (at least an hour!). Then, you must cover the surface of the ice cream pie directly with a layer of plastic wrap. Press that plastic right down onto the whipped topping. Seriously, press it tight enough that it touches the fudge swirls. Then, cover the whole pie plate tightly with aluminum foil or place the whole dish inside a large, sealed container. If you skip that direct plastic wrap layer, the topping will get icy and develop that weird freezer flavor.
If you’ve stored your homemade ice cream pie like this for a few days, don’t pull it out and try to slice it rock-hard! It will shatter. Just like when prepping it, take it out of the freezer about 15 to 20 minutes before you plan to serve it. That little bit of time lets the filling temper slightly, making those slices glide out smoothly. If you want to learn some other great ways to preserve flavors, check out my recipe for easy freezer jam, no canning recipe—it’s all about quick preservation!
Understanding Ice Cream Cake vs Pie for Frozen Desserts
People often ask me about the difference between an ice cream cake vs pie, especially when they see crusts involved. Honestly, for me, it comes down to the base structure. An ice cream cake usually has a layer of actual baked cake—like a sponge or brownie—underneath the ice cream filling. Think of my recipe for cotton candy cake; that’s cake first, then filling.
But what we have here is absolutely an ice cream pie because the entire base is built on a pressed crust—in our case, those gorgeous Oreos mixed with butter. That crust acts like the pastry shell in a traditional pie, holding everything together without needing to be baked. So, if it has a buttery, crumbly edge leaning against a dish, it’s a pie in my book. If it has a spongy base, it’s definitely a cake! It’s a small distinction, but it matters when you want that perfect crunch in every single bite.
Frequently Asked Questions About Making an Ice Cream Pie
I always get so many questions when people see this recipe pop up! It’s a staple for me, but I know for some of you, making a big frozen dessert like this ice cream pie can feel intimidating. Don’t let it! We’re covering the basics here so you can serve this up confidently, whether it’s for a giant crowd or just a quiet night where you deserve something spectacular. These tips should help make your pie assembly go perfectly, landing you right in the sweet spot of those great easy summer desserts.
Can I use a graham cracker ice cream pie crust instead of Oreos?
Absolutely! That’s one of the joys of making a great ice cream pie—customization! If you aren’t strictly craving that deep chocolate crunch, you can easily switch gears and make yourself a wonderful graham cracker ice cream pie. Just swap out the crushed Oreos for about 1 1/2 cups of graham cracker crumbs. You’ll need just a little less binder—use 1/4 cup of melted butter instead of 1/2 cup. Press that in just the same way and freeze it hard before adding your lovely vanilla layer!
What is the best way to make a homemade ice cream pie without churning?
That’s the easiest part! This particular recipe is already set up for you if you don’t have an ice cream maker or don’t want to bother with a true no-churn recipe, which can sometimes take 12 hours to set up. Since we are starting with store-bought, softened ice cream, this is already a true homemade ice cream pie that skips the churning process entirely. You let the pros handle the churning, and you handle the assembly and the decorating!
How far in advance can I prepare this quick ice cream pie?
If you’re planning ahead for a party, you can definitely get a head start! Because this ice cream pie relies on freezing time, you can technically assemble the entire thing—crust, ice cream layer, whipped topping, and final drizzle—and freeze it for up to about two weeks. Remember what I said about wrapping it tightly? That’s key here. As long as it’s sealed up tight to keep the air out, this quick ice cream pie waits perfectly for your event!
Sharing Your Experience with This Ice Cream Pie
Now that you’ve made this incredible ice cream pie, I really want to hear about it! Honestly, seeing what you all come up with is half the fun for me. Did you stick to the classic Oreo base, or did you brave out and try making a graham cracker ice cream pie crust? I want to know if you took inspiration from those cherry chocolate versions or went totally rogue!
Head down to the comments section below and leave a rating for this recipe—it really helps other home cooks find reliable recipes like this one. And please, share the little tales from your kitchen! Did the kids help crumble the cookies? What wild flavor combinations did you try out for your next event? Every story you share builds out the legacy of this recipe, connecting us all together. I read every single comment, and I can’t wait to see what you served up!
If you want to know a little more about where these recipes come from and the story behind Julia Meal, you can always check out my About page. Thanks so much for letting me share this easy summer dessert with you!
PrintNo-Bake Ultimate Oreo Ice Cream Pie

Make this easy, no-bake ice cream pie using a crunchy Oreo crust and creamy filling. This frozen dessert recipe is perfect for summer gatherings or any time you need a quick, crowd-pleasing treat.
- Prep Time: 20 min
- Cook Time: 0 min
- Total Time: 3 hours 20 min
- Yield: 8 servings 1x
- Category: Dessert
- Method: No Bake
- Cuisine: American
- Diet: Vegetarian
Ingredients
- 1 3/4 cups crushed Oreo cookies (about 30 cookies)
- 1/2 cup unsalted butter, melted
- 1/2 gallon vanilla ice cream, softened slightly
- 1/2 cup chocolate fudge sauce, warmed
- 1 cup heavy whipping cream
- 2 tablespoons powdered sugar
- 1/2 teaspoon vanilla extract
- Optional toppings: extra crushed Oreos, chocolate shavings
Instructions
- Prepare the crust: Mix the crushed Oreo cookies and melted butter in a bowl until the crumbs are evenly moistened. Press the mixture firmly and evenly into the bottom and up the sides of a 9-inch pie plate. Freeze the crust for at least 30 minutes while you prepare the filling.
- Prepare the ice cream layer: Spread the slightly softened vanilla ice cream evenly over the frozen Oreo crust. Drizzle half of the warmed chocolate fudge sauce over the ice cream layer.
- Freeze the pie: Return the pie to the freezer and freeze for at least 2 hours, or until the ice cream is firm.
- Make the whipped topping: In a separate bowl, beat the heavy whipping cream, powdered sugar, and vanilla extract with an electric mixer until stiff peaks form.
- Assemble and finish: Spread the whipped cream topping over the frozen ice cream layer. Drizzle the remaining chocolate fudge sauce over the whipped cream. Sprinkle with optional crushed Oreos or chocolate shavings.
- Final freeze: Freeze the ultimate ice cream pie for at least 1 hour before slicing and serving.
Notes
- For an even easier version, substitute the homemade whipped cream with 1 tub (8 ounces) of frozen whipped topping, thawed.
- You can customize this homemade ice cream pie by using coffee, mint, or strawberry ice cream instead of vanilla.
- If you prefer a graham cracker ice cream pie, use 1 1/2 cups of graham cracker crumbs mixed with 1/4 cup melted butter for the crust.
Nutrition
- Serving Size: 1 slice
- Calories: 450
- Sugar: 45g
- Sodium: 350mg
- Fat: 28g
- Saturated Fat: 16g
- Unsaturated Fat: 12g
- Trans Fat: 0.5g
- Carbohydrates: 48g
- Fiber: 1g
- Protein: 5g
- Cholesterol: 60mg