
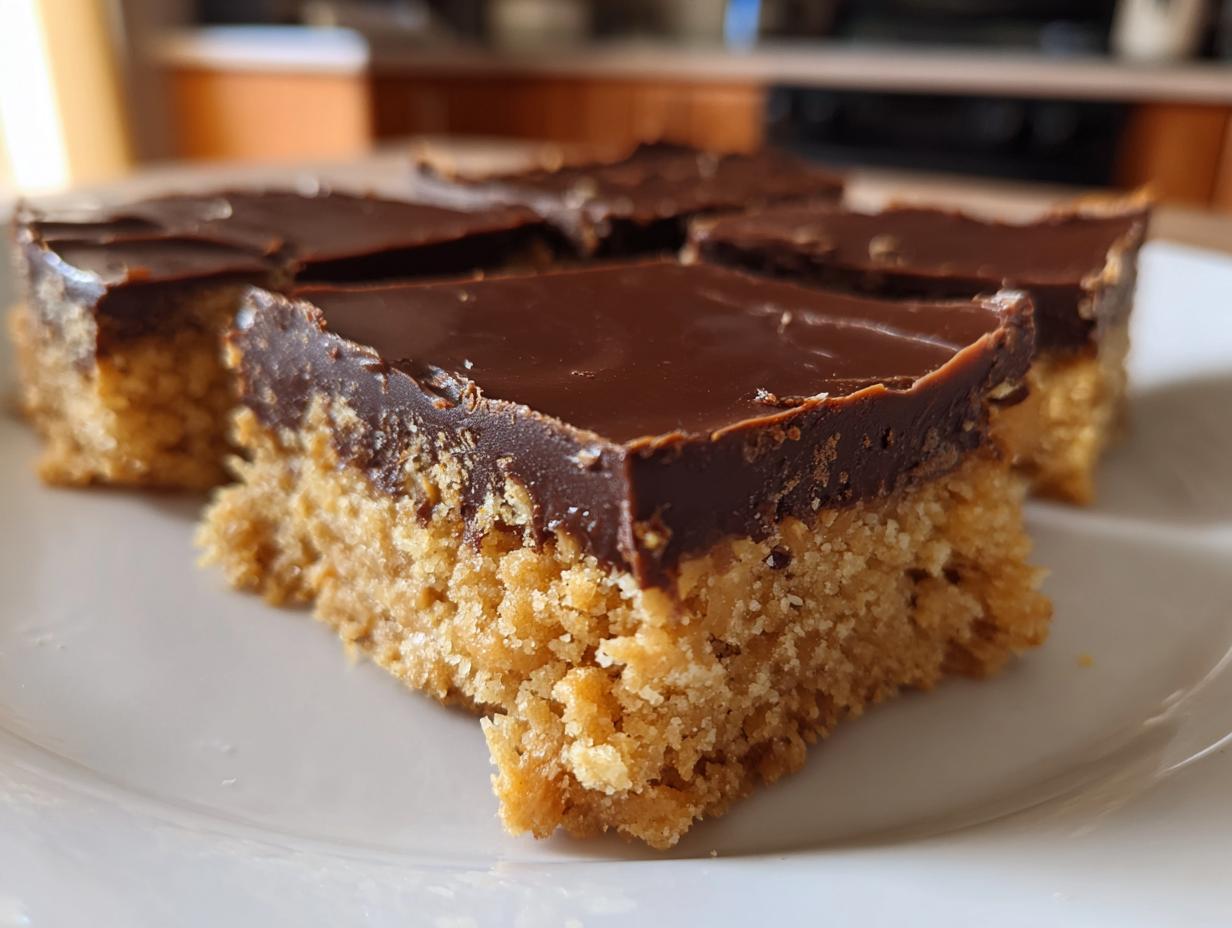
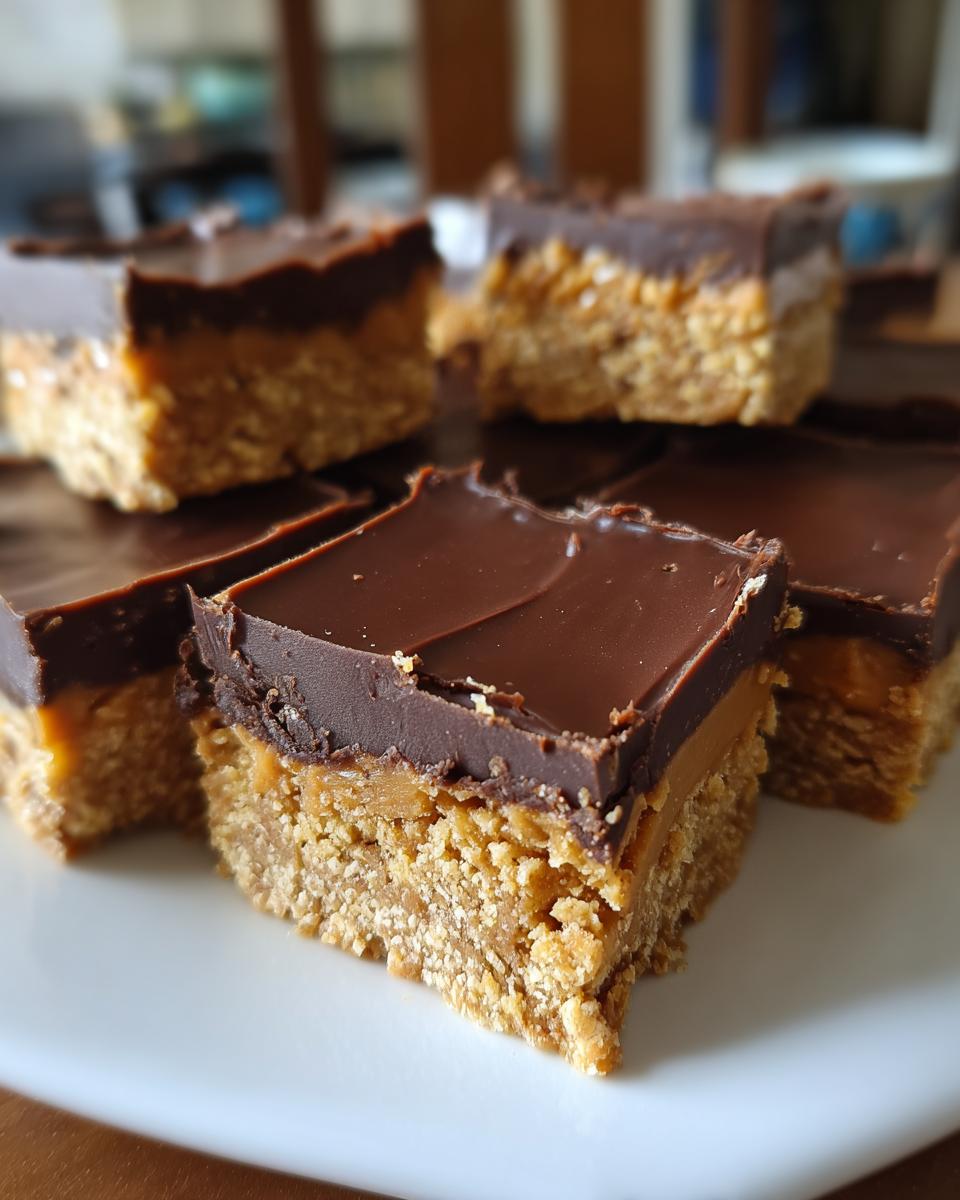
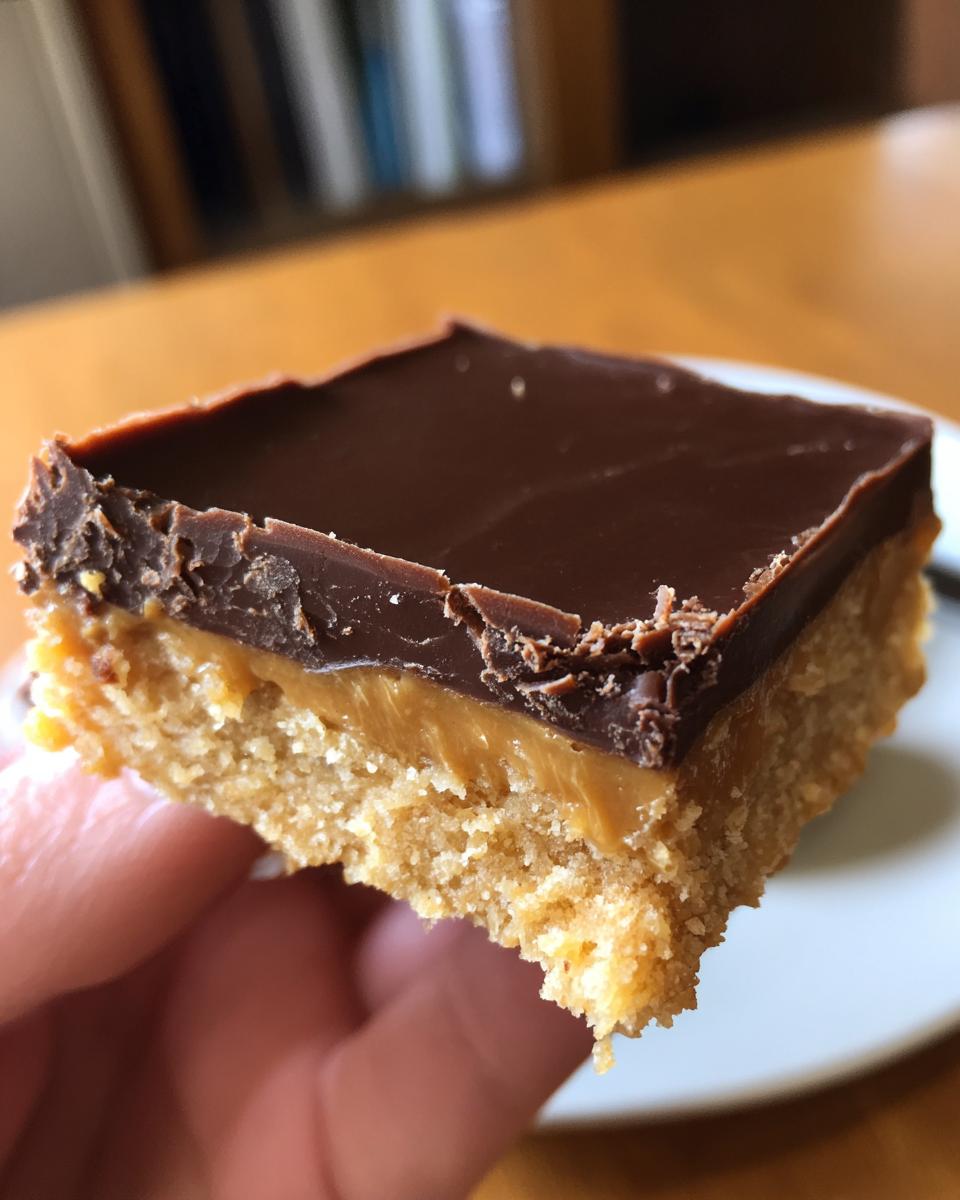
You know that feeling when a smell or a taste just pulls you right back to childhood? For me, it’s always the smell of slightly sweet, creamy peanut butter, and that’s exactly what happens when I make these **lunch lady peanut butter bars**. Every time I whip up a batch of these **Classic Cafeteria Treats**, I’m twelve again, sneaking an extra one wrapped in wax paper. Seriously, these are the real deal you’ve been searching for.
Forget complicated baking! This is my definitive, absolutely foolproof, no-bake version. They come together faster than you can brew a pot of coffee, giving you that supremely satisfying, chewy texture we all crave. If you grew up loving those comforting desserts the lunch ladies used to slip onto your tray, you need this recipe in your life. You can even check out more of my favorite simple, delicious desserts while you wait for these to set!
- Why You Will Love These Lunch Lady Peanut Butter Bars
- Gathering Ingredients for Your Easy Peanut Butter Bars Recipe
- Step-by-Step Instructions for Perfect Lunch Lady Peanut Butter Bars
- Tips for Making the Best Peanut Butter Graham Cracker Bars
- Storage & Reheating Instructions for Lunch Lady Peanut Butter Bars
- Frequently Asked Questions About Nostalgic Peanut Butter Dessert
- Serving Suggestions for Potluck Peanut Butter Treats
- Estimated Nutritional Data for These Chocolate Peanut Butter Bars
- Share Your Favorite School Lunch Desserts
Why You Will Love These Lunch Lady Peanut Butter Bars
- They are completely no-bake! Zero oven time means less mess and faster gratification.
- Pure nostalgia—they taste exactly like those wonderful **Classic Cafeteria Treats** from grade school days.
- That base texture is incredible: perfectly dense, sweet, and wonderfully chewy thanks to the graham crackers.
- You only need simple ingredients you probably already have, making this an incredibly **Easy Peanut Butter Bars Recipe**.
- The topping is rich and fudgy; it sets up beautifully firm but still melts slightly in your mouth.
- They hold up great on a platter, making these the ultimate crowd-pleaser for potlucks and gatherings.
Honestly, what’s not to love about a bar that requires zero actual baking time? Seriously, these **lunch lady peanut butter bars** are my secret weapon for unexpected treats.
Gathering Ingredients for Your Easy Peanut Butter Bars Recipe
Okay, setting up for these **Easy Peanut Butter Bars Recipe** is honestly the fastest part, and trust me, you want to have everything ready before you start mixing. Since this is a no-bake dessert, the quality and temperature of your ingredients really matter for getting that perfect consistency. Do not try to substitute natural, runny peanut butter here—we need that thick, creamy kind that holds its shape, okay? This is key!
I’ve broken down what you need below. If you want to learn more about handling peanut butter in desserts, I have some great tips on making peanut butter fudge that might help you out too!
For the Peanut Butter Graham Cracker Base
- 1 cup unsalted butter, softened so it’s perfectly pliable, not melted.
- 2 cups powdered sugar, sifted if you have time, but honestly, just break up the clumps.
- 1 cup creamy peanut butter (the classic kind!).
- 1 1/2 cups graham cracker crumbs—you can crush these yourself, or use the pre-ground kind.
- 1 cup all-purpose flour.
- 1/4 teaspoon salt, just to balance out all that sweetness!
For the Rich Chocolate Peanut Butter Topping
- 1 cup semi-sweet chocolate chips.
- 1/2 cup creamy peanut butter (yes, more peanut butter!).
That’s it! See how simple that is? Lay everything out, and you’ll be pressing that sweet base into the pan in minutes.
Step-by-Step Instructions for Perfect Lunch Lady Peanut Butter Bars
Alright, let’s make some magic happen! These **Lunch Lady Peanut Butter Bars** rely on simple layering, but the technique is everything if you want that perfect **Sweet & Chewy Bar Recipe** texture. Don’t rush the chilling part—that’s the real secret weapon for these no-bake beauties!
Preparing the Pan and Mixing the Base
First thing’s first: get that 9×13 inch pan ready. You absolutely must line it with parchment paper first, and for the love of sweetness, leave an overhang on the long sides! That overhang is your handle later for lifting the whole slab out cleanly. That saves so much frustration, trust me.
Once the pan is set, just beat your softened butter and powdered sugar until they look nice and fluffy together. Then, we dump in the peanut butter, the graham cracker crumbs, the flour, and the salt. You mix this on low speed just until it comes together. It’s going to look chunky, like thick dough.
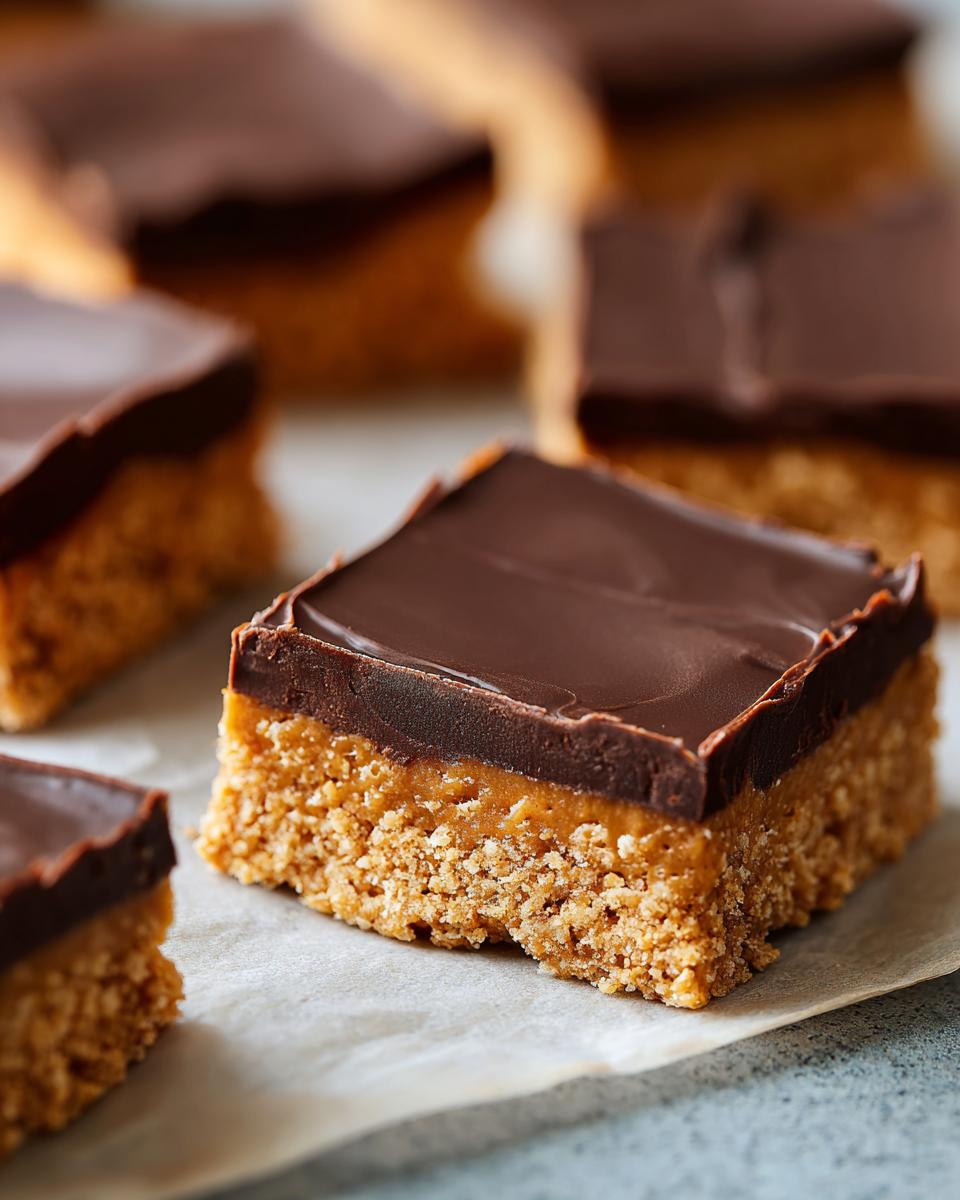
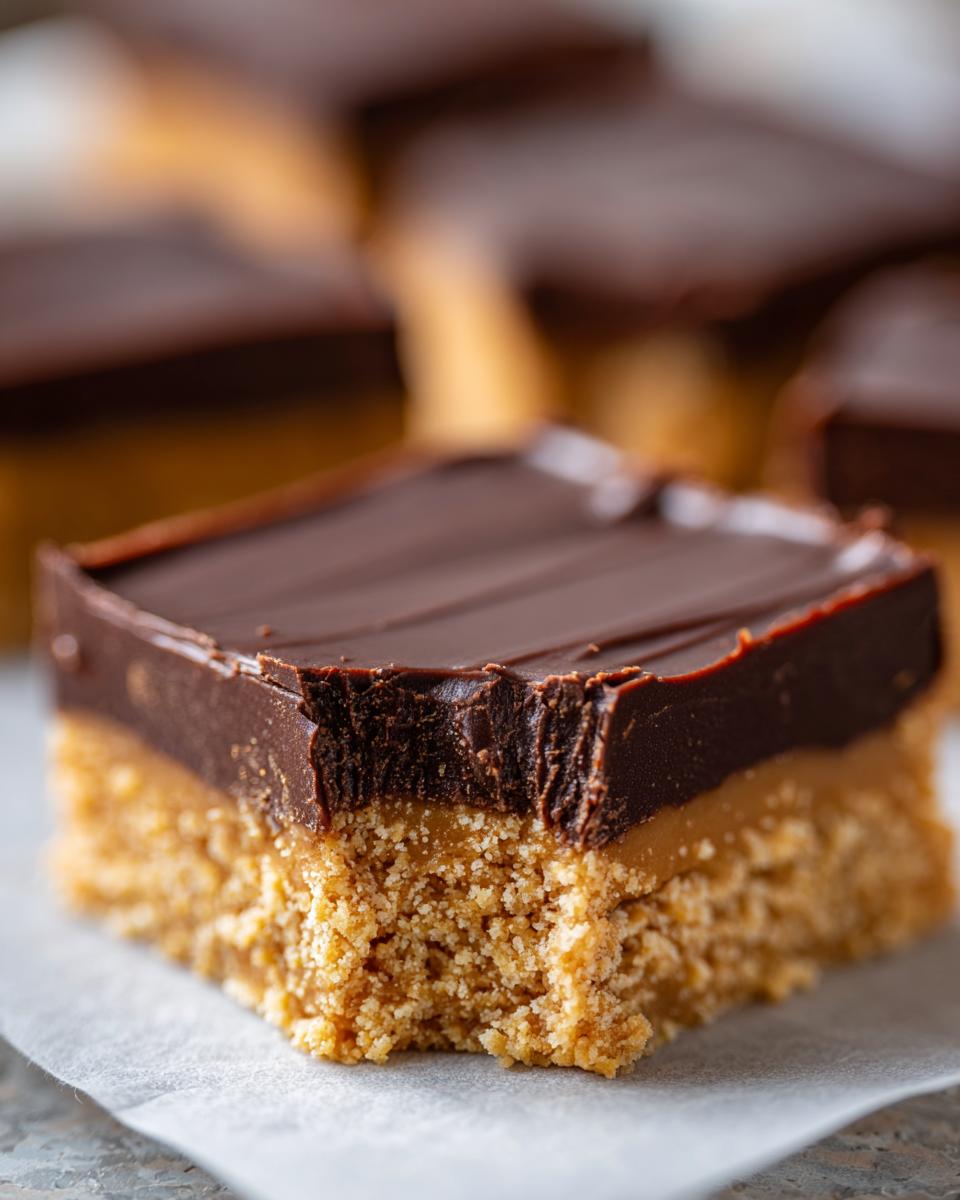
Now comes the expert part: press this base layer firmly into your prepared pan. I like to lay a piece of plastic wrap directly over the base and use the bottom of a flat measuring cup to really pack it down evenly. You want this layer super compact so it doesn’t fall apart when you cut it later!
Creating and Spreading the Chocolate Topping
Time for the glorious chocolate top! You need a microwave-safe bowl for your semi-sweet chocolate chips and that last half-cup of creamy peanut butter. This needs your attention!
Microwave the mixture in 30-second bursts. But here’s the crucial part: stir it thoroughly after every single 30 seconds. If you walk away, you’ll burn the chocolate, and nobody wants that. Keep stirring until it’s completely smooth and glossy. It should pour like a thick ribbon. You can find another great shortcut technique for melting chocolate in my easy saltine cracker toffee recipe, too!
Pour that warm, melty chocolate mixture right over your packed peanut butter base. Use an offset spatula—or just the back of a spoon—to spread it gently out to the edges. Be careful not to scoop up the base layer while you’re spreading!
Chilling and Serving Your Homemade Lunch Lady Bars
Now, the hardest part: waiting. Pop the whole pan into the refrigerator. You need this to chill for at least two hours so that beautiful chocolate topping sets up hard enough to slice. I usually just leave them overnight if I can hold off!
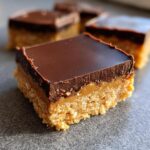
Once they are totally firm, use those parchment overhangs to lift the entire brick of bars onto a cutting board. If you want those super neat, professional-looking cuts for serving your **Homemade Lunch Lady Bars**, use a large, sharp knife. You can even run the blade under hot water for a second and wipe it dry between slices. It melts through the chocolate cleanly every time. Cut them into squares and get ready for the applause!
Tips for Making the Best Peanut Butter Graham Cracker Bars
Even though these **lunch lady peanut butter bars** are no-bake, throwing in an extra little trick can take them from good to absolutely legendary! Because we aren’t using any eggs or flour for structure, we have to rely on the binding power of that butter and peanut butter mixture.
If you want a little more texture in the base, feel free to swap that creamy peanut butter for crunchy! It adds a nice little unexpected surprise when you bite in. Also, if you find yourself out of graham crackers, crushed vanilla wafers work beautifully—they give the base a slightly sweeter, less wheaty flavor. You can find my recipe for easy vanilla cupcakes if you ever need a different base idea!
Remember, since the chocolate top doesn’t have any hardener besides refrigeration, you must store these airtight in the fridge. They stay perfect for nearly a week, which is great because I always make a double batch!
Storage & Reheating Instructions for Lunch Lady Peanut Butter Bars
Now that you’ve made these magnificent **Lunch Lady Peanut Butter Bars**, keeping them fresh is super simple because they perform best when they are cold.
The very best way to store these is definitely in an airtight container. I try to place a layer of parchment paper between any layers of sliced bars so they don’t stick together into one giant chocolatey brick, especially if you want to keep them separated for gifting or easy serving.
They absolutely must stay in the refrigerator. Since there’s no baking involved, the butter and the chocolate topping need that chill to stay firm and retain their shape. If you leave them out on the counter, things get soft fast!
The good news is you don’t need to worry about reheating these goodies at all, since they are meant to be served cool and dense. Honestly, they are even a little chewier and better on day two! You can expect these **Lunch Lady Peanut Butter Bars** to stay perfectly fresh and delicious in the fridge for up to one full week. Make a big batch now, thank yourself later!
Frequently Asked Questions About Nostalgic Peanut Butter Dessert
Can I use natural, runny peanut butter instead of creamy?
Oh, I wouldn’t recommend it for these **No Bake Peanut Butter Bars**, honey. Natural peanut butter tends to separate, and the liquid oil will seep into your base, making the whole thing greasy and unstable. We need that classic, shelf-stable creamy peanut butter to keep the base holding together perfectly. Consistency really matters when you aren’t using the oven to set things! If you’re looking for another reliable recipe, check out how I handle structure in my chicken and wild rice casserole recipe; binding ingredients is key!
Do these bars absolutely have to stay in the refrigerator?
Yes, they do! Think about it—the structure relies on chilled fats from the butter and the chocolate topping. If you leave them on the counter, especially if your kitchen is warm, that gorgeous chocolate layer will get messy fast, and the base will soften too much. Keep them stored airtight in the fridge to maintain that perfect, dense texture we’re aiming for in this **Nostalgic Peanut Butter Dessert**.
I really prefer to bake things. Can I turn this into a baked bar?
That’s a great question, but that would turn this into a completely different recipe. These **Lunch Lady Peanut Butter Bars** are designed to be utterly simple and *no-bake*. If you try to bake the base, the sugar content will cause it to melt right back out into a puddle. Stick to the chilling process for that authentic, chewy square!
What’s the trick to getting really clean cuts when serving?
This is where I always pull out my kitchen trick! After you’ve chilled them until they are totally firm (at least two hours), use a large, sharp knife. Dip the knife into a glass of very hot water—not just warm, *hot*—wipe off the excess water quickly, and then slice. The heat melts through that thick chocolate topping perfectly. Wipe and reheat the knife for every single cut you make for beautiful squares!
Serving Suggestions for Potluck Peanut Butter Treats
These **Potluck Peanut Butter Treats** look fantastic when you present them nicely, even though they are super easy! Because the chocolate topping is so shiny, they catch everyone’s eye on the dessert table immediately. I usually cut them into slightly smaller squares than normal—people tend to take two that way, sneaky!
They are incredible all by themselves, but serving them next to a small bowl of fresh raspberries gives a lovely pop of color. And of course, you must have a big pitcher of cold milk ready, though a nice hot cup of black coffee makes the richness of the chocolate really sing. If you ever need another easy appetizer for your next big gathering, you absolutely must try my easy dill dip recipe!
Estimated Nutritional Data for These Chocolate Peanut Butter Bars
Now, let’s talk numbers. I know some of you want to track things, so I’ve put together the estimated nutrition information based on how I make these amazing **Chocolate Peanut Butter Bars**. Remember, these are just estimates, okay? They change depending on whether you use slightly more butter or a different brand of peanut butter. That’s food science for you!
When you are making something this comforting, you don’t obsess over the details, but seeing the breakdown reminds you just how rich these **Chocolate Peanut Butter Bars** are!
- Serving Size: 1 bar
- Calories: 250
- Fat: 15g (with about 6g saturated fat)
- Carbohydrates: 26g
- Sugar: 22g
- Protein: 5g
- Sodium: 110mg
- Fiber: 1g
- Cholesterol: 15mg
My advice? Don’t stress too much about this line item when you are serving up slices of pure joy. Just know that the joy is worth every single calorie. This is old-fashioned comfort food, meant to be savored!
Share Your Favorite School Lunch Desserts
Well, we made it! You now have the blueprint for the absolute best **lunch lady peanut butter bars** on the planet. I really hope making these brings back some of your favorite memories, too. That feeling of pure, unadulterated sweet nostalgia is what I aim for in every recipe I share!
Since these **School Lunch Desserts** are so close to my heart, I would absolutely love to hear from you. Did you make them? Were they just as chewy and decadent as you remember? Please hop down to the comments below and let me know! A rating helps other readers know that this recipe works beautifully, and honestly, I live for the stories you share!
If you made these and they disappeared way too fast (which they always do!), please consider sharing this post with your friends or pinning it so others can enjoy this piece of our culinary history. You can always reach out to me directly via my contact page if you run into any snags, though I doubt you will with this straightforward recipe!
Happy baking—or, I should say, happy *chilling*! Enjoy every last one of these amazing **lunch lady peanut butter bars**!
PrintThe Definitive No-Bake Lunch Lady Peanut Butter Bars
Make classic, nostalgic Lunch Lady Peanut Butter Bars with this simple, no-bake recipe featuring a peanut butter graham cracker base and a rich chocolate topping.
- Prep Time: 20 min
- Cook Time: 0 min
- Total Time: 2 hours 20 min
- Yield: 24 servings 1x
- Category: Dessert
- Method: No-Bake
- Cuisine: American
- Diet: Vegetarian
Ingredients
- 1 cup unsalted butter, softened
- 2 cups powdered sugar
- 1 cup creamy peanut butter
- 1 1/2 cups graham cracker crumbs
- 1 cup all-purpose flour
- 1/4 teaspoon salt
- 1 cup semi-sweet chocolate chips
- 1/2 cup creamy peanut butter (for topping)
Instructions
- Line a 9×13 inch baking pan with parchment paper, leaving an overhang for easy lifting.
- In a large bowl, beat the softened butter and powdered sugar together until smooth.
- Add 1 cup of peanut butter, graham cracker crumbs, flour, and salt to the butter mixture. Mix on low speed until just combined. The mixture will be thick.
- Press the base mixture evenly into the bottom of the prepared pan.
- In a microwave-safe bowl, combine the chocolate chips and the remaining 1/2 cup of peanut butter. Microwave in 30-second intervals, stirring well after each, until the mixture is smooth and fully melted.
- Pour the chocolate mixture over the peanut butter base and spread it evenly to cover the entire surface.
- Refrigerate the bars for at least 2 hours, or until the chocolate topping is firm.
- Use the parchment paper overhang to lift the bars from the pan. Cut into squares before serving.
Notes
- For cleaner cuts, run your knife under hot water and wipe it dry between slices.
- Store leftovers in an airtight container in the refrigerator for up to one week.
- You can substitute crushed vanilla wafers for graham cracker crumbs if desired.
Nutrition
- Serving Size: 1 bar
- Calories: 250
- Sugar: 22
- Sodium: 110
- Fat: 15
- Saturated Fat: 6
- Unsaturated Fat: 9
- Trans Fat: 0
- Carbohydrates: 26
- Fiber: 1
- Protein: 5
- Cholesterol: 15