
Let’s be honest, there’s nothing quite as disappointing as hacking into a sweet potato expecting that gorgeous, fluffy center only to find dense, slightly chewy disappointment. I’ve seen it happen everywhere, from rushed weeknight tables to high-end restaurant plating. After years working in professional kitchens where precision was everything, I brought that intensity back to my home kitchen to solve this exact problem. Trust me when I say that mastering baked sweet potatoes is about technique, not luck. Forget those flimsy foil pouches; I’m showing you the foolproof, no-foil oven method that guarantees a perfectly caramelized, crispy skin and an interior so light it practically floats.
- Why This is the Best Baked Sweet Potato Technique (No Foil Needed)
- Ingredients for Perfectly Baked Sweet Potatoes
- How to Prepare Baked Sweet Potatoes Perfectly: Step-by-Step
- Tips for Success with Your Easy Baked Sweet Potato Recipe
- Transforming Baked Sweet Potatoes with Topping Ideas
- Meal Prep Sweet Potatoes: Storage and Reheating
- Serving Suggestions for This Healthy Sweet Potato Side Dish
- Frequently Asked Questions About Baked Sweet Potatoes
- Estimating Nutrition for Your Baked Sweet Potatoes
Why This is the Best Baked Sweet Potato Technique (No Foil Needed)
When I first started cooking, the default instruction was always to wrap potatoes in foil. But that traps all the steam inside, and what do you get? A steamed, slightly soggy skin. That’s fine for a classic baked potato, but for sweet potatoes, we want something better—we want that incredible contrast!
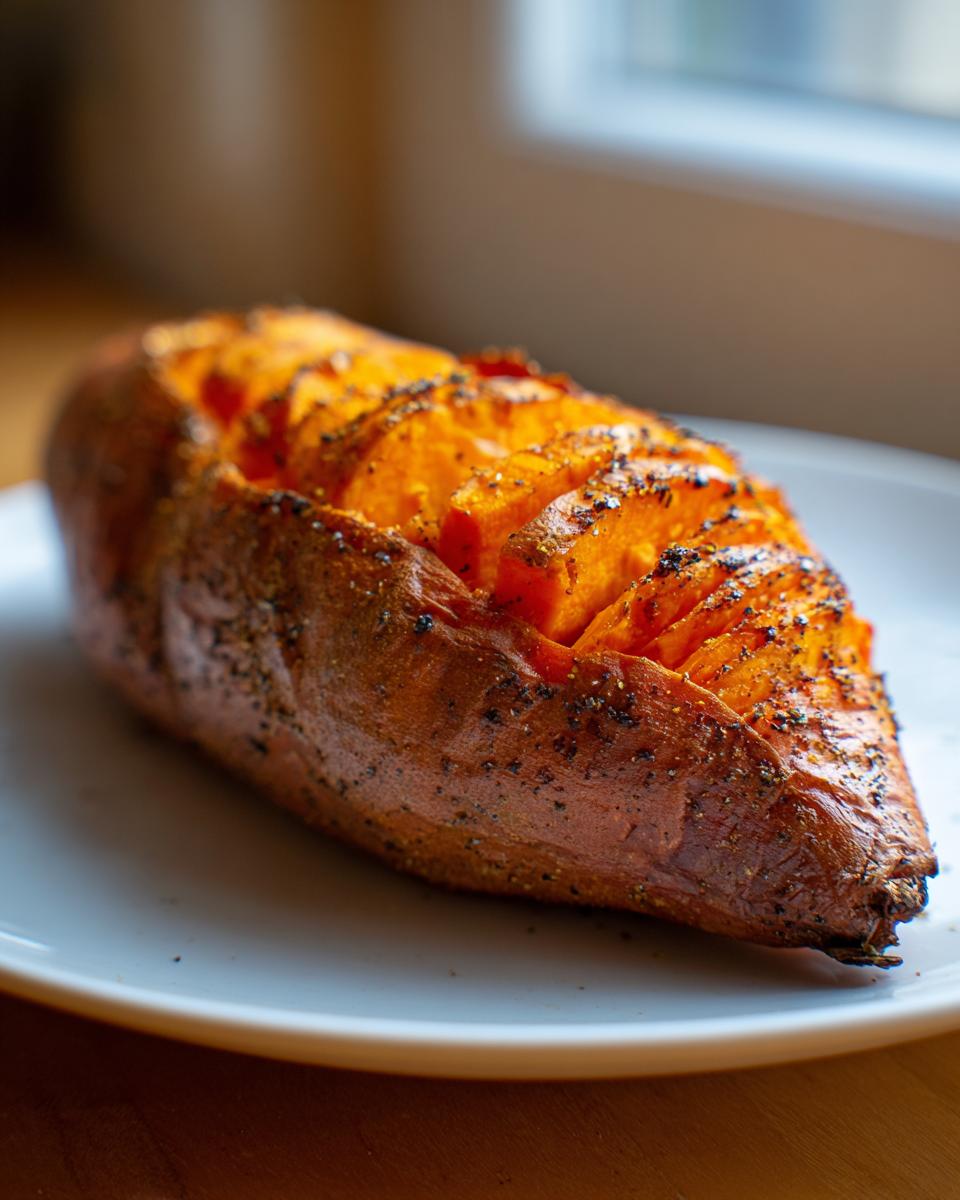
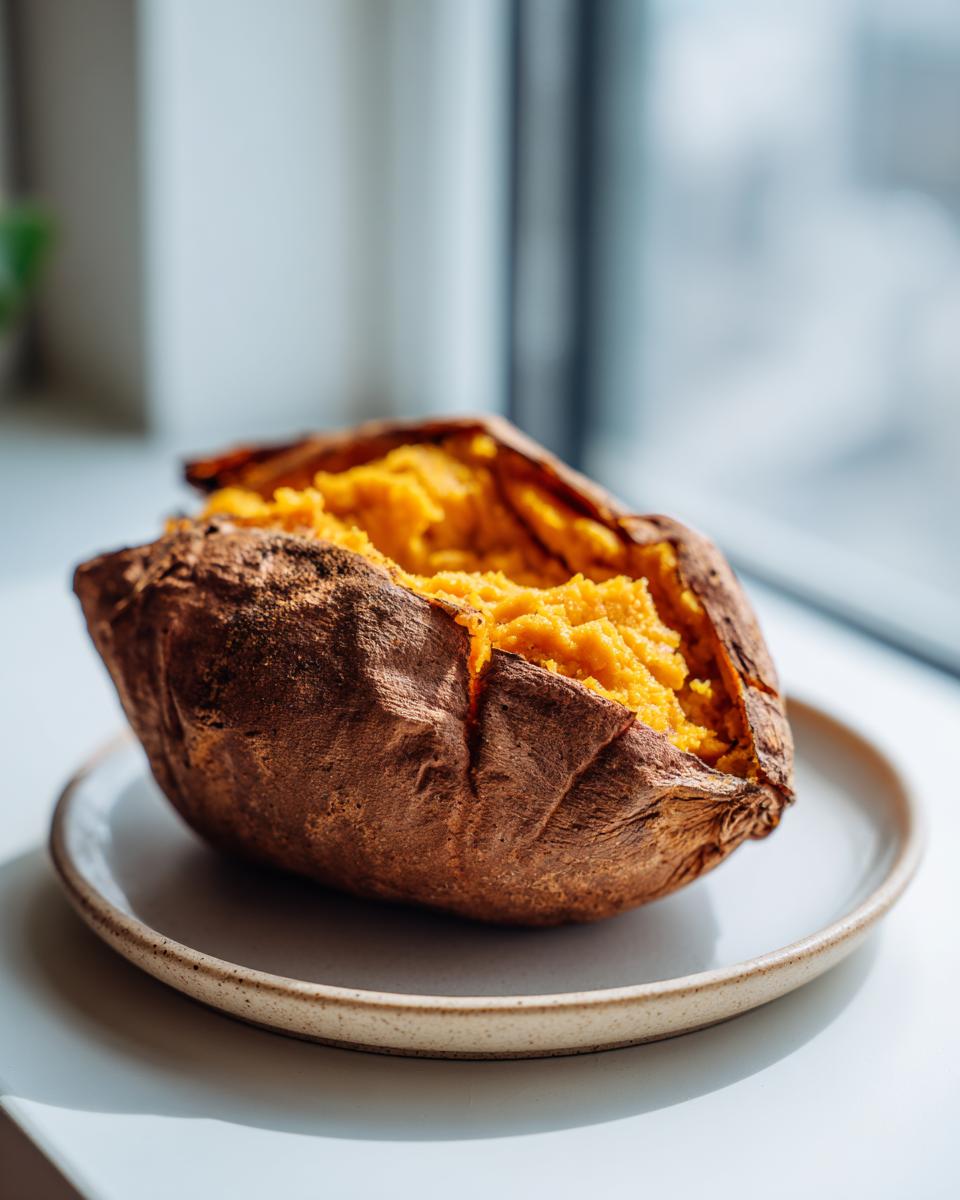
This approach is the best baked sweet potato technique because we skip the foil entirely and let the high, dry heat of the oven work its magic directly on the skin. By rubbing them with just a little olive oil and salt before placing them straight onto the rack, we force the outside to crisp up while the inside steams perfectly from its own moisture. This is how we guarantee that incredible crispy skin sweet potato oven finish we’re all aiming for.
Achieving Caramelized Sweet Potato Edges
That slight chewiness and deep, sugary flavor you get around the edges? That’s pure caramelization, and you can’t get it trapped inside foil! The direct heat evaporates the surface moisture while concentrating the natural sugars in the skin. Make sure your oven is fully preheated before those potatoes go in. It’s those first few minutes of intense, dry heat that lock in the texture. It makes these potatoes perfect for serving alongside something great, maybe even as a base for twice baked goodness later on!
Ingredients for Perfectly Baked Sweet Potatoes
The beauty of this recipe, like so many great home-cooked things, is how unbelievably simple the ingredient list is. It proves that when you nail the technique, you don’t need a basket full of exotic powders or spices to make something wonderful. We are harnessing the natural sweetness of the potato here!
Gather these four things. That’s it. Seriously, I think this might be the easiest bread substitute you could ask for, in terms of prep, anyway!
- 4 medium sweet potatoes (aim for about 8 to 10 ounces each—consistency helps them cook evenly!)
- 1 tablespoon olive oil (regular, good quality stuff is perfect)
- 1 teaspoon coarse sea salt (I like the texture you get from the larger crystals)
- 1/2 teaspoon black pepper (freshly cracked if you have it, it always tastes brighter)
That’s the foundation right there. The oil is key for that crispy skin, and the salt pulls out just a little extra flavor while it bakes. Don’t feel you have to use brown sugar now; the potato is sweet enough on its own!
How to Prepare Baked Sweet Potatoes Perfectly: Step-by-Step
Okay, this is where the magic happens! If you follow these steps precisely, I promise you’ll master how to bake sweet potatoes perfectly every time. We aren’t doing anything fancy here; this is just about respecting the vegetable and using the oven correctly. This is the secret to those simple oven baked sweet potatoes that shine on their own.
First thing: Get that oven roaring! Preheat your oven to a solid 400 degrees Fahrenheit. It’s important that the heat is steady and waiting when the potatoes go in. Remember, no baking sheet underneath them—they sit right on the middle rack. Let them bake for about 45 to 60 minutes, but don’t just set a timer and walk away!
Crucial Prep: Washing and Piercing Your Baked Sweet Potatoes
You absolutely must scrub them well! Think of it like giving them a nice little spa treatment. Once they are clean, grab a paper towel and make sure they are bone dry. Any moisture clinging to the skin will turn into steam and work against our goal of getting that crispy finish. Next, grab a sharp fork and pierce each potato deeply, maybe 4 to 6 times all the way around. This lets the built-up steam escape. If you skip this, you risk an explosion, and nobody wants sweet potato shrapnel on their ceiling like that time I tried to rush a roast before learning about proper venting, which you can read about if you’re planning a sweet potato side dish!
Baking Time and Checking for a Fluffy Baked Sweet Potato Guide
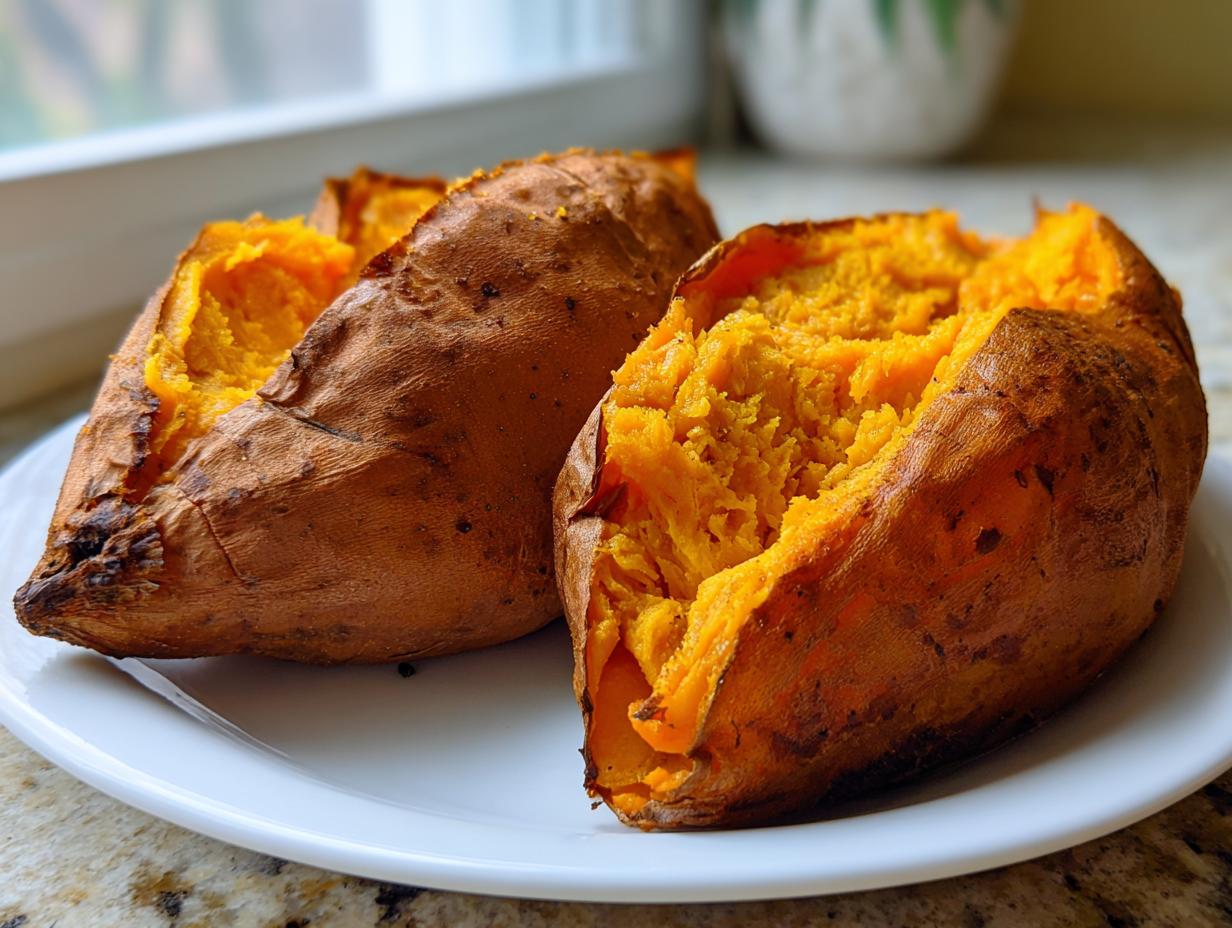
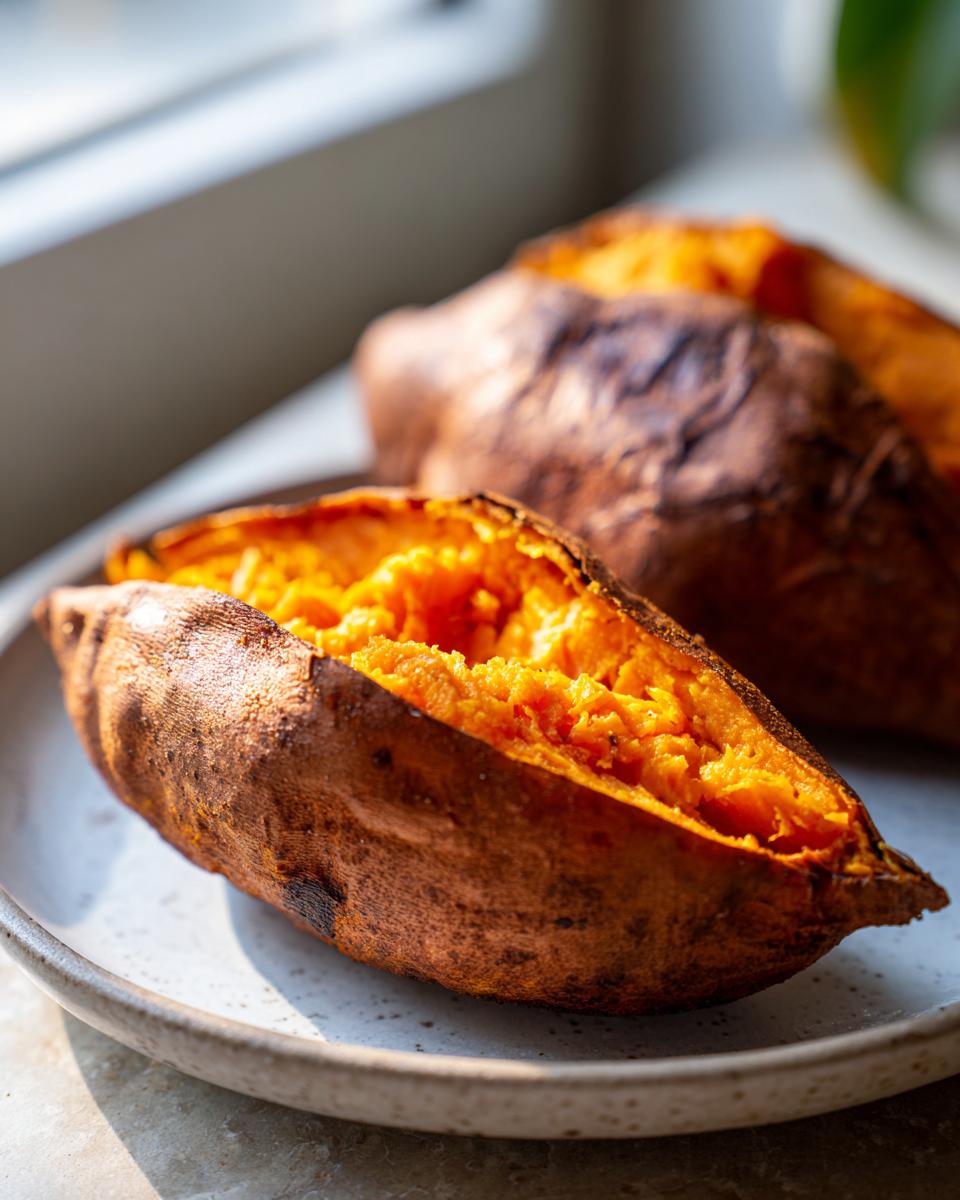
Once you’ve rubbed them with oil and salt, get them directly onto the rack. Now, you wait. Forty-five to sixty minutes is our range, but remember, size matters! Once the time is up, we switch to the tried-and-true home cook tests. First, give the sides a gentle squeeze—it should yield easily under pressure. If the potato fights back, give it another 10 minutes. Then, the real test for that fluffy baked sweet potato guide: stab a knife into the thickest part of the center. If the knife slides in with zero resistance, they’re done! Pull them out, let them rest for five minutes, and slice them open lengthwise. Now, take a fork and fluff that incredible, naturally sweet inside right up! It takes the focus right off the main course, just like my foolproof roast recipe does.
Tips for Success with Your Easy Baked Sweet Potato Recipe
Now that you know the technique, let me share a few little adjustments I use when I’m trying to get a meal on the table quickly. While 400°F is my golden standard for that perfect skin, sometimes life happens, and you need dinner faster. Remember, this is the foundation for an easy baked sweet potato recipe that works for you!
The biggest thing I want you to remember is that we are intentionally going without foil here. If you wrap them up, you lose that gorgeous texture we worked so hard to create in the oven. Don’t let kitchen shortcuts sabotage your crispy skin!
Adjusting Temperature for Quick Sweet Potato Dinner Idea
If you’re planning these as a last-minute quick sweet potato dinner idea, you can definitely bump up the heat. I’ll often push the oven to 425 degrees Fahrenheit. You trade a little bit of that deep, slow caramelization for speed, but you’ll still get a great result. Just be sure to start checking them around the 35-minute mark. If you’re rushing, you don’t want to overbake them into mush! You want that fluffy texture, not a puree. It’s a fantastic base for a quick weeknight meal when you pair it with something simple, like a quick protein or a side from my eggnog recipe (wrong season, I know, but just pointing out that quick recipes are always around!).
Transforming Baked Sweet Potatoes with Topping Ideas
The baked sweet potato, fresh out of the oven with that fluffy interior, is honestly delicious just with a tiny pat of butter. It’s naturally sweet enough to stand on its own! But why stop there, right? If you’re looking to turn this simple side into something truly memorable, you have to explore the wonderful world of sweet potato topping ideas. These potatoes are such a perfect base because they can swing sweet or savory without any issue at all.
I often treat a hot, fluffy baked sweet potato like a blank canvas for whatever flavors I’m bringing out for dinner that night. Sometimes I go classic—a sprinkle of cinnamon and brown sugar, maybe a drizzle of maple syrup if I’m feeling indulgent. But if you’ve had something salty or acidic as the main course, you’ll want to lean into the savory side!
Savory Inspiration: Garlic Butter Sweet Potato Bake
When I’m craving that rich, comforting flavor profile, I always look to mimic the effect of a great garlic butter sweet potato bake. You don’t even need to bake them *with* the garlic butter; you can just stir it in after they come out of the oven. Imagine taking that steaming, bright orange flesh and mixing in a spoonful of melted butter infused with fresh minced garlic and maybe a sprinkle of fresh thyme or chives. The warm, salty fat cuts through the sweet potatoes’ natural sugars beautifully. It elevates the whole dish!
If you want to see a fantastic example of how rich that can be, you absolutely must check out the recipe for homemade garlic butter sweet potato bake I found. It’s got that cozy, savory kick that tastes incredible next to a piece of roasted chicken or smothered over something like my Garlic Parmesan Chicken Pasta.
Meal Prep Sweet Potatoes: Storage and Reheating
One of my favorite things about mastering the perfect baked sweet potato is how unbelievably great they are for planning ahead. Seriously, mastering meal prep sweet potatoes has saved my weeknights more times than I can count. They hold up so well, and since we didn’t wrap them in foil, they don’t get that weird, damp texture after refrigeration.
If you decide to bake a double batch—and trust me, you should—here is my simplest system. You can store these baked babies whole, or if you want to save space, scoop out the fluffy insides and store that separately. They last really well in an airtight container in the fridge for up to four days. That’s an almost instant, healthy side dish waiting for you!
When you’re ready to eat one, just slice it open. If you stored them whole, sometimes a quick 5 to 10 minutes in a toaster oven brings that skin right back to life! If you scooped them out, just zap them in the microwave for 60 seconds or stir them into something warm, like a hash. This makes planning your lunch meal prep ridiculously easy.
Serving Suggestions for This Healthy Sweet Potato Side Dish
Honestly, once you have this perfect fluffy, slightly sweet base, serving suggestions are endless. It’s a testament to how versatile a really well-made, healthy vegetable side dish can be. I always try to think about balancing the natural sweetness. If I’m going savory with my main course, the sweet potato balances that out beautifully—it’s culinary harmony, if you ask me!
When I batch these out for my weekly planning—which I do whenever I put together my meal prep—I make sure to have toppings ready that can swing savory. For example, pairing these with a lean protein like grilled chicken or flaky white fish is fantastic. The starchy, sweet interior soaks up any pan juices, offering way more depth than plain white rice ever could. If you’re looking for ways to incorporate leftovers into mornings, maybe even check out my guide for healthy breakfast ideas!
If you are leaning toward a lighter meal for better balance, these are dynamite paired with a big, crisp salad loaded with dark greens. Think spinach or kale. You could even just break the potato open, toss it with some chopped pecans and a tiny drizzle of olive oil for textural contrast, and call it a lunch! It’s an incredibly satisfying base for when you’re trying to keep things simple and delicious after a busy work week. For more ideas on keeping your main meals exciting, check out my favorite quick and easy weeknight dinners guide. Sometimes, the side dish is what makes the meal truly sing!
Frequently Asked Questions About Baked Sweet Potatoes
I know you might have a couple of lingering questions. Look, when you’re trying to nail a technique like this, the details matter, and I want you to feel 100% confident walking away from this page. Asking questions is how we get better in the kitchen, right? When I was learning the precise temperatures in those fancy restaurants, I asked a million questions! It’s how you move from just following a recipe to truly understanding it.
Here are the things I hear most often about getting that perfect bake. If you’re trying to figure out an easy pairing, remember that these potatoes go great with something creamy, like my Broccoli Cheddar Soup!
How long to bake sweet potatoes for the fluffiest result?
It really depends on the potato! We always start at 400°F, and the timing range is generally 45 to 60 minutes. If you have smaller, slender potatoes, you might only need 40 minutes. If you picked some real monsters, you might push closer to an hour. The main thing is that you stop trusting the clock and start trusting the squeeze test. If you squeeze gently and they feel soft all the way through—that’s when you know you’ve achieved that fluffy interior.
Are oven roasted sweet potatoes vs baked different?
Oh, yes, they are absolutely different, although they both bake in the oven! When people talk about oven roasted sweet potatoes vs baked, they usually mean we’ve cut the sweet potatoes into cubes or chunks, tossed them liberally with oil, and spread them out on a sheet pan. Roasting at high heat cooks the edges fast, giving you tons of those crispy, browned, flavorful bits all over. When we talk about baking whole sweet potatoes, like we are doing here, we are aiming for one single, large, fluffy center encased in a perfectly seasoned, slightly tougher skin. Both are delicious, but they create totally different textures!
Do I really need to skip the foil for my easy baked sweet potato recipe?
Yes! I can’t stress this enough if you want crispy skin. Foil traps moisture right against the skin, which ends up steaming it instead of baking it dry and crisp. We are aiming for a naturally sweet baked potato that’s ready for anything, and that means skipping that foil wrap. It’s the single best thing you can do for that great texture!
Can I use these for simple sweet potato preparation or meal prep quick?
Absolutely! That’s one of the major upsides to this technique. They come out perfect and ready to use either right away or later in the week. They are fantastic as meal prep sweet potatoes stored whole in the fridge. When you reheat them, even just for a few minutes, the skin gets a little tighter, but the inside stays beautifully soft and ready for your dinner.
Estimating Nutrition for Your Baked Sweet Potatoes
I always feel better knowing roughly what we are putting into our bodies, even when it’s something as naturally good for us as a sweet potato! Because we are only using olive oil, salt, and pepper in this simple oven baked sweet potatoes recipe, the nutritional profile stays wonderfully clean. It’s such an excellent, backbone side dish for almost any meal plan.
Keep in mind that these figures are purely estimates based on the four medium sweet potatoes baked according to the recipe, without any added toppings like butter or sugar. Also, remember that the size of your potatoes can change the numbers slightly, but this gives you a great baseline. This is Option A information—straight facts based on the primary ingredients we used.
- Serving Size: 1 medium potato
- Calories: 180
- Sugar: 13g (This is natural sugar; look how little compared to the total carbs!)
- Sodium: 250mg (This is entirely from the added salt, so watch your topping habits!)
- Fat: 5g (Again, mostly coming from that tablespoon of olive oil we used to crisp the skin!)
- Saturated Fat: 1g
- Unsaturated Fat: 4g
- Trans Fat: 0g (Good riddance!)
- Carbohydrates: 34g
- Fiber: 5g (Fantastic for keeping you full!)
- Protein: 3g
- Cholesterol: 0mg
See? A powerhouse of vitamins and fiber wrapped in a perfectly crisp little package. It’s definitely one of my go-to decisions when I need a healthy vegetable side dish.
PrintThe Foolproof Method for Perfectly Baked Sweet Potatoes: Crispy Skin & Fluffy Inside

Learn the simple, no-foil oven technique to achieve sweet potatoes with a perfectly caramelized, crispy skin and a naturally sweet, fluffy interior every time. This recipe works well as a healthy side dish or a base for meal prep.
- Prep Time: 5 min
- Cook Time: 50 min
- Total Time: 55 min
- Yield: 4 servings 1x
- Category: Side Dish
- Method: Baking
- Cuisine: American
- Diet: Vegetarian
Ingredients
- 4 medium sweet potatoes (about 8–10 ounces each)
- 1 tablespoon olive oil
- 1 teaspoon coarse sea salt
- 1/2 teaspoon black pepper
Instructions
- Preheat your oven to 400 degrees Fahrenheit. Place an oven rack in the middle position.
- Scrub the sweet potatoes well under running water to remove any dirt. Dry them completely with a paper towel.
- Pierce each sweet potato 4 to 6 times deeply all over using a sharp fork. This allows steam to escape.
- Rub the entire surface of each sweet potato with olive oil.
- Sprinkle the coarse sea salt and black pepper evenly over the oiled skins.
- Place the seasoned sweet potatoes directly onto the middle oven rack. Do not use foil or a baking sheet.
- Bake for 45 to 60 minutes. The exact time depends on the size of your potatoes.
- Check for doneness by squeezing the sides gently; they should yield easily. A knife inserted into the center should meet no resistance.
- Remove from the oven. Let them cool slightly before slicing them open lengthwise down the center. Fluff the inside flesh with a fork.
- Serve immediately with your favorite toppings, such as butter, brown sugar, or cinnamon.
Notes
- For faster baking, you can bake them at 425 degrees Fahrenheit, checking after 35 minutes.
- To make this a base for meal prep, store the baked potatoes whole or scooped out in an airtight container in the refrigerator for up to 4 days.
- If you prefer a savory topping, try melted garlic butter and fresh herbs after baking.
Nutrition
- Serving Size: 1 medium potato
- Calories: 180
- Sugar: 13
- Sodium: 250
- Fat: 5
- Saturated Fat: 1
- Unsaturated Fat: 4
- Trans Fat: 0
- Carbohydrates: 34
- Fiber: 5
- Protein: 3
- Cholesterol: 0